
R Law
roblaw@ethz.ch
the meteorite is the source of the light
An Englishman’s guide to skiing in western Norway
When I moved to Norway I had no idea what ‘friluftsliv’ or ‘fjellski’ were. Both, it transpires, are key components of the western Norwegian psyche.
I knew Norwegians liked cross-country, I knew Norwegians were supposedly nuts about nature (ahem), and I knew ski-touring was kind of a thing, maybe. However, I also felt rather lost and disoriented when I arrived in mid-winter, with colleagues talking about ski trips and cabin stays in remote mountains I couldn’t place on a map. And, when I did look at the map, it just looked like a maze of fjords and plateaus.
So, now that I know a thing or two (no expert, but done a few solo trips), and given I learnt this all as an adult, rather than before I started school, I thought I’d share some things I picked up along the way1. The emphasis is on winter activities with Bergen as a base, but the links should also be useful for the spring transition season and some summer hiking, too.
If you read through the whole thing you’ll get a pretty good idea of what’s going on (hopefully), or just skim to look for the headers relevant to you. This is intended as a broad overview so that you don’t feel super lost. YouTube videos will be a better option for details such as getting your boots into bindings, and specific skiing techniques.
First, what is friluftsliv
Roughly translated, this is ‘open-air life’, or ‘outdoor living’. This means regular immersion in nature for the sake of it (non-competitive, usually) and is something many Norwegians been institutionalised into since birth have grown up with. Honestly, it’s nice – the outdoors here are for everyone and people are serious about behaving responsibly out there.
So where to start with skiing?
Well, you have three options which, unfortunately, require three different types of skis and three different types of boots:
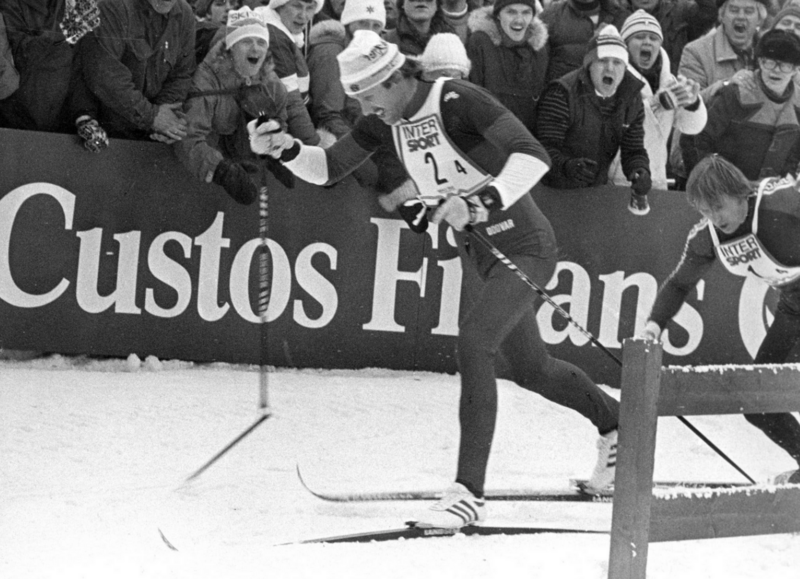
Langrennsski (cross-country skiing): This is what most people think of when they think of skiing in Norway. You attach spindly lightweight skis to your feet, find a track, have a terrifying time going downhill and a workout going up. You will get absolutely left in the dust by a 16-year-old practising their skating.
Fjellski (mountain skiing): Fjellski has my heart. I had not heard of this before moving to Norway, but these are the more robust older sibling to langrennsski, with steel edges so that you can (at least in theory) reduce your speed down a hill. These are built for fairly long distances going gently up and down away from the prepared tracks. If you were skiing to the South Pole, you would use these skis.
Topptur (touring skis, randonee): You can use these in a resort, but mostly you attach skins to the bottom of them so that you can go up a mountain of your choosing before going back down it. These are high-tech pieces of kit, with specialist bindings, skin attachments, and funky boots.
There are also variations within each of these, but these are the main categories.
Some useful websites and services
I’m putting this towards the top even if it relies on some of the below as this might be one of the most useful parts of this post.
Websites
There are some great websites out there, but they’re not always super well advertised:
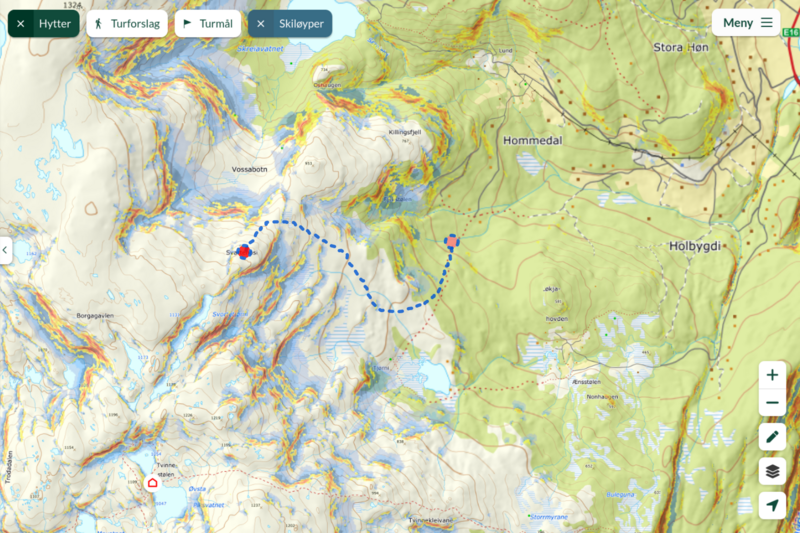
ut.no: This is (I think?) run by DNT (Den Norske Turistforening). On the kart tab you will find info about all the marked trails in Norway, including the skiing ones. You can also see all of the cabins, both DNT and independent. It has really nice pictures for these.
varsom.no: Primarily this is used for information about avalanches, but you’ll also find flood, landslide, etc. info here. The map tab on the avalanche page is the most useful part. Follow their advice on what the ratings mean, and take a course if you’re unsure.
Copernicus: This is a super useful hack for checking snow conditions from recent satellite imagery. You could try something like senorge.no, which has a proper snow model, but in my opinion there’s either enough snow to ski, or not enough, and you can work that out by seeing if there are lots of rock bands visible in satellite imagery. This is particularly useful for checking if a cabin is accessible in spring without requiring skis.
Road information: Road maintenance or issues happen, and it can take a very long time to drive around that closed tunnel. Take a look at Statens vegvesen before long journeys.
Glacier atlas: This is just a neat and well-put-together tool. It will show you where all the glaciers are in Norway, including the really tiny ones.
westcoastpeaks.com: And its continuation are great for primarily summer hiking info. Also Scandinavian Mountains site if you are after 2,000 m tops.
Services
DNT: The big one, Den Norske Turistforening. They don’t advertise outside of Norway, but they do a fantastic job of looking after hytter (cabins) in remote places. Visit them at dnt.no, or drop in to their store in Bergen. DNT membership is a very good idea if you’re going on their trips or using the cabins. The cabins come in three flavours:
-
Unserviced – the most basic, but still oh so much better than UK bothies. In these you will find comfortable beds, gas for cooking, and wood for heating.
-
Self-service – these are like unserviced, but usually a bit bigger and with a store cupboard where you can get dried and canned food.
-
Serviced – these are amazing. Expect a three-course meal in the evening, probably a shower, and a good breakfast the next day. They’re not cheap, but really worth trying once (or twice).
For all of these, remember to bring your own sleeping liner.
Dele: This is a car-share service based in Bergen and Trondheim. It’s amazing that this exists and it’s a great resource. Prices are reasonable and people leave the cars responsibly clean after use (that’s up to you, too!). This makes a lot of sense if you live here. Visit dele.no for more.
Where to get skis
Rent them at the resort: The most expensive option if you’re doing this regularly, and it limits you to resort areas, but it is usually hassle-free.
Buy from a store: In Bergen this could be Intersport, Outdoor, or XXL. Outdoor is independent and has great service. XXL is a big big chain with few staff, horrible lights, but cheap prices. There is also Platou, though my one experience with these guys was negative (sorry!) – very expensive and kind of condescending.
Get them from finn.no: This is Craigslist for Norway and it’s generally good deals with accurate descriptions and reasonable people. You could, for example, search ‘fjellski’ then set the location to Vestland, Bergen. Messaging in English is fine. This is where I got my very trusty pair of 90s made-in-Norway Fjellski and bamboo poles for ~600 NOK.
Borrow them from Bua: This is an incredible service, with free rental of equipment for a period of a few days. They have a few centres in Bergen, so check the website for opening hours (usually a few days a week, for a few hours). To make an account with them you need a Norwegian phone number or someone who is willing to let you use theirs. I still do not have one, so I only used this once along with a friend, but this is maybe the way to go if you live here and just want to check it out.
Generally, langrenn are cheapest, followed by fjellski, and then topptur.
When is the ski season?
December to May. Well, the Voss resort usually opens in the first week of December and closes early April. The Myrkdalen resort a bit further up the valley might stay open a couple more weeks after that. I skied over Jostedalsbreen on the 17th of May weekend and I think they ran one more trip the week after, but skiing at much lower elevations would have been rather impractical. This year (2025) snow conditions were very bad, so things wrapped up earlier, but I still got a trip in at Finse towards the end of April.
The ski season in Bergen itself is more like a couple of weeks sometime in January-February. If you’re lucky then, you may have the chance to ski the løyper up Fløyen above Bergen on langrennsski, or the longer Vidden route on fjellski.
All that said, December (and January) can be not super ideal. You really need to plan around the available daylight, the conditions can be full on, and early in the season the snow conditions could be not great.
Falling over (a.k.a. starting out)
Disclaimer, when I moved to Norway I could passably ski down a groomed track. This was a big help, but not a requirement. Mostly it helped feel a bit more comfortable on langrennsski and fjellski, but I definitely had my fair share of tumbles getting started on these (and still fall over regularly).
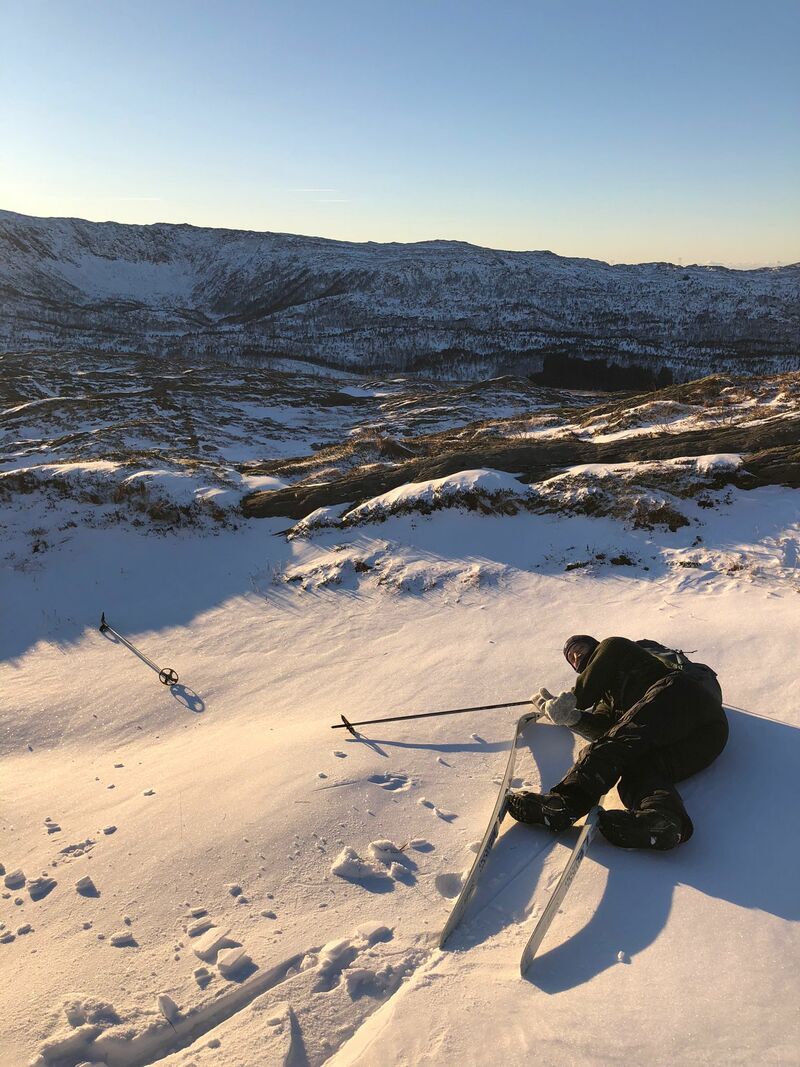
You could book lessons, but I think for langrenn and fjell, it’s also just as well to go for the natural approach of starting very easy and gradually doing harder things until before you know it you’re on your way. For example, if you’ve never skied before, going 200 m on langrenn is going to feel like a big deal, well done! You will fall over a lot so, make sure you’re wearing clothing that covers all exposed skin and remember that it’s usually better to fall sooner rather than later, when your speed is even higher. A good fall should take some of the force and not leave you in an awkward position, but there is definitely no elegant way of doing this. Much better to fall sideways in a skid than end up going over the nose of your skis.
When you are down, you will feel very immobile. To get back up, try to get both skis under your centre of gravity, and use your poles to get yourself squatted, then standing. If you use your hands these will just go into the snow when you put weight on them. Make sure you’re also aligned across the slope, or you will just immediately fall over again!
Dangers
Before we get into the actual skiing it’s important to say: skiing can be dangerous, and people die doing this every year. The only real risk from skiing very close to a cabin on the flat is torn ligaments, twisted joints etc., but things can quickly escalate. I’m not a safety professional, but here are some key things to be wary of:
Frozen lakes: The feeling of skiing over a frozen lake is incredible, and often these are very safe. A good couple of weeks at minus 10 is going to make most water safe. There will still be some water flow under there however, so be aware of patches that could have more running water and hence thinner ice. Also watch out in spring when things get a bit slushy. Actually, a little bit of surface melt is not necessarily something to worry about if it’s the first thaw of the year – if the ice is still deep underneath that extra weight is not going to cause it to break up – but this is a sign for concern if it’s later into spring.
Following people is not necessarily a good idea. Trust your own instincts if you’re unsure. I remember venturing out onto a frozen lake on Vidden following some Norwegians and having slush come up to my ankles while I could feel the plates underneath move. Not fun or recommended, but okay in the end!
Avalanches: Absolutely not to be taken lightly. But these can be largely avoided by sticking to low-angled slopes away from runoff zones. ut.no/kart is a great resource for this. Go to layers and turn on bratthets- og utløpsområdekart. Don’t go in anything marked green, yellow, orange, red, or blue, and you’re going to be fairly safe, with a lot of super fun mountains still to explore. Slopes below 27° are much less likely to have sustained avalanche activity (non-coloured), while the blue areas mark where large avalanches could potentially run into. I think that the ut.no kart is fairly conservative, that is, I’ve never felt sketchy in an area marked safe on ut.no/kart. But, as with everything here, I am not an expert, and this is not a guarantee.
Personally, I stick almost exclusively to safe slopes. I am simply not a good enough skier that I have a burning desire to venture into steeper slopes, and knowing I’m in potentially avalanche terrain gives me the heebie-jeebies. If you are going into avalanche terrain, you will need avalanche gear and you should probably take an avalanche course for the safety of yourself and those who might need rescuing. This post is not an avalanche safety post. The best I can do is direct you to something like this if you want to find out more.
General bodily harm: Falling over in awkward ways can lead to injury, of course, and generally scales with the speed at which your body hits something, mitigated somewhat by the softness of the snow. Watch out, and be careful. Helmets are very much recommended for topptur. If you’re going fast and tomahawk, having something on your noggin will be a help. People doing langrennsski and fjellski generally don’t wear helmets (I don’t, either), but I have a friend who got a bad concussion from a fjellski fall. If you’re worried about this, wear a helmet and to helvete what people think about it.
Exposure: Norway is cold, frequently! It may also be very windy and dark. At a minimum, if you’re venturing out into the mountains proper you should have a decent pair of gloves and a backup, a roll mat, a sleeping bag, a serious hat or balaclava, goggles, plenty of layers, and a shovel. If the worst comes to it you can then at least make a snow wall or a cave and stay warm. If it’s a bluebird day in April and you’re not going far, is this necessary? No, you can take a more limited set. But, if you’re going some distance and the weather is even slightly uncertain then it’s a good idea. DNT trips will mandate this equipment.
You may also want to get a vindsekk (or wind sack). These are rather expensive, and I don’t have one for this reason, but they might save you in a pinch, or offer somewhere more comfortable to eat your brunost sandwiches. This type of thing can also be rented from BUA. Of course if you’re camping anyway, then you don’t need a vindsekk. I only have limited experience camping in winter, and I’m not going to go into details here, but get in touch if you’d find that useful.
Getting lost: I was on a DNT trip where it was -18, dark, windy and snowy. The guide took out their mobile phone and the ut.no website to get us to the cabin. I did not ask, but sincerely hope there was a backup option. If money were no object this would be a satnav with built-in inReach. When I went on my solo trip I borrowed one of these from a friend, and felt a lot better for it.
Getting started with Langrennsski
It’s very common for Norwegians to have a pair of langrennsski knocking about, so there are a lot of cross-country tracks around Bergen that won’t have hire – the assumption is you will just have your own already.
If you’re looking for a resort, Voss is the sensible option. It’s a little over an hour away from Bergen by train and has a gondola right from the station to the top of the mountain. From there you can hire out skis and be on your way on some nice well-maintained tracks in no time.
Otherwise, you can go to Geilo, also by train, but that’s quite a long way away from Bergen and I prefer the western Norwegian mountains.
Locally and without hire, there are the routes up Fløyen when the conditions are in. This can be really nice, there are good vibes going up the funicular when everyone in it is looking forward to a good ski. And, unlike in Oslo (or so I’ve heard), people are generally very nice and accommodating if you’re slow or falling over a lot.
Further afield there are routes at Gullbotn about 40 mins away, or Kvamskogen a bit over an hour away. You can reach them by bus, but it’s not so great for an evening. Watch you with bus timings, you don’t want to get get stranded in -20!
You shouldn’t really venture off prepared tracks with langrenn, though it is possible. Many introductory langrennsski have fish scale bases or perma attached narrow skins. These will provide some grip going uphill, which is good. Otherwise you enter the exciting world of waxes (see Waxes and skins header).
The boots on langrennsski are very lightweight and can feel flimsy. They will also let a lot of snow in if you do venture off the tracks into powder. Personally, I am less of a fan of langrenn for these reasons – it can all feel a bit artificial and contrived, but it’s the way to go if you want to be the next Klæbo (Klæbo brostep supercut). Which brings us to…
Getting started with fjellski
Your best option here is going with someone who knows what they’re doing, which may sound like a bit of a catch-22. However, you can also take the same approach as for Langrenn, and just gradually increase the distance and difficulty alone. Just watch out, fjellski beckon the mountains proper, and once you’re off the marked tracks more dangers await.
Personally, I used my fjellski on langrenn tracks for a couple of trips before progressing off the tracks while teaching on a field course (so there were plenty of others around). If you’re taking this approach, note that langrenn tracks are too narrow for broad fjellski, so you may want to take this into account when you buy your fjellski, though there will always be a flat section next to the tracks for gliding, and it’s no real penalty to use these instead if your skis are too broad. Using broad skis on narrow tracks is a no-no, it damages them for other users!
Once you feel comfortable, I’d recommend following a gentle ‘twig’ route. These are routes set up by DNT or other volunteer organisations in late winter and early spring. Sometimes these are groomed, but often they are not. These are a good bet, they tend to follow safe routes, and as long as you have 6 m visibility you are not going to get lost. That said, you should still be careful (see Dangers). You could, for example, start with some (maybe even all) of this fairly flat route from Hallingskeid to Finse, with Hallingskeid also having a nice DNT cabin right by the station.
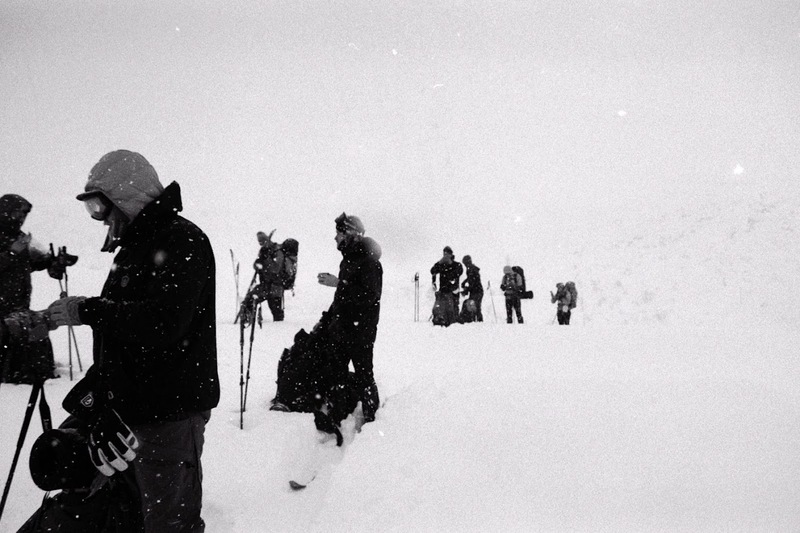
When you have your fjellski legs, you may want to embark on your first DNT trip. You can find these listed here. They will say when they open for booking, and it’s better to be early to avoid disappointment. Most, if not all, people on these trips will be speaking Norwegian. This is a great way to meet Norwegians from different walks of life, but it is a good idea to have some Norwegian basics. Even if you can’t communicate properly they will appreciate that you’re trying. Doing two multi-day DNT fjellski trips really took me from ok-ish to passable, but it’s definitely a good idea to start out on the easier end.
As DNT trips are often a bit adventurous, you could also try to find an experienced friend to go on a shorter trip such as this which is ‘only’ 6 km and 300 m height gain.
From there, more possibilities open up. After this I did my first solo trip (to Grindaflethytta) and felt confident enough to sign up for a trip over Jostedalsbreen, though that was still a big struggle and learning experience2.
As for equipment, aside from the skis you will need boots, poles, and other safety equipment (see Dangers). I first bought some very retro Alfa boots from finn, before progressing to a fancy pair of Gore-Tex Alfas with built-in gaiters. The built-in gaiters do work great, but you can get away with ones that look more like regular hiking boots and then add gaiters if needed, and these will be nice if you’re skiing in spring when there is no powder and it’s warm.
I started off with bamboo poles, which were great! When one finally snapped when I fell on it, I got a pair of Swix aluminium ones that were on offer at XXL. These are longer than normal downhill poles, but I use them for that too anyway, because I’m cheap.
Getting started with topptur
So, you have decided to take things up a notch. For me, this took two years of living in Norway before I made the leap, but it was well worth it. With topptur, the skill, planning, and danger can all creep up, and you definitely want to be proficient on piste before making the change. That said, the experience of standing on top of a peak in bluebird conditions, with a clean 500 m of vertical descent to take you back down is incredible.
With topptur, you are more likely to be in avalanche terrain, though it’s surprisingly easy to avoid it, with the difficulty then being finding people to join who are happier on more mellow slopes. If so, try to go with people who are more experienced than you, or join a DNT trip – as with the fjellski DNT trips though, make sure you’re good enough first that you won’t be a drag on everyone else. You don’t need to be an elite athlete, but you should probably have tried to skin up and go down a handful of times.
My first topptur was just going 150 m above the lift at a resort, and for me that was already great. Then I did a couple more trips with friends, and got the hang of it without too much trouble, helped along by experience in fjellski. If you can go downhill without crashing every two minutes on fjellski, it’s likely topptur will be a breeze.
Unlike fjellski, topptur is suited to having minimal switches between up and down. It’s a lot more faff to take skins off and on again, and long flat stretches are a bit awkward. Norwegians also frequently don’t go all the way to the very top — they’ll get within a hundred metres of the top, but if it won’t be good for skiing, or has a short downhill section first, they’ll just turn around. For me, this is not the way to go; I like thinking of topptur as turbocharged hiking and getting a top is always nice, but it’s something to be aware of.
As for equipment, you will need expensive skis and boots. I got my boots through some previous field work (hurray), but the skis were around 4,500 NOK including skins and bindings from finn. These serve me great, but you would be looking at upwards of 10,000 NOK to get new skis alone. A guide like this will give you a good introduction.
There are good resources for routes. For example, though you are well off doing your own research. I’ve been lucky enough to go with people more experienced than myself most of the time, who then picked the routes. I did go up Storhaugane and Skomanosi from Hallingskeid on my own though, both of which were great and avoided avalanche terrain.
Waxes and skins
Waxes
Ahh, waxes. In Bergen, there are more than a handful of people who moved here for a partner, broke up with said partner, and decided to stay. One of these people informed me how her Norwegian ex-husband made such a thing of skiing, but could never get his waxes right. Don’t be that person!
Basically, you choose a wax based on the temperature, apply it, and hope you got that right. These waxes go from polar (-25°C to -13°C) to klister for melting snow. Really, klister isn’t wax; it’s this horrible paste stuff which is super sticky. In between these is a variety that goes in smaller increments the closer to melting you get. These will also change depending on whether the snow is ‘fresh’, or more than a day or two old.
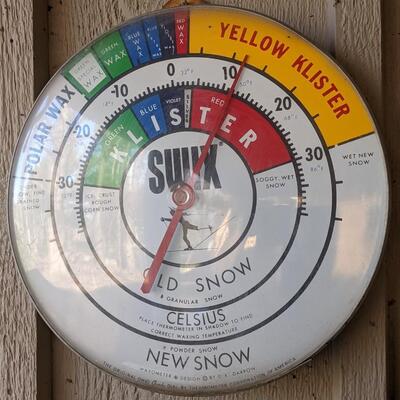 The good ol’ Swix thermometer
In practice though, you kind of just go for it and use a bit of trial and error. If your wax is too ‘cold’, your skis just won’t stick; if it’s too ‘warm’ you might end up with loads of snow sticking to your skis, which is not great either, but can be remedied by rubbing your skis over one another. It’s best to start with cold waxes and layer up from there, rather than the other way around. Åsnes the ski company has a good guide here. The main thing though, is to keep the wax to the central part of your skis. That way, it’s grippy when you stand on one foot and kick off, but glides otherwise — in principle at least.
In addition to the waxes, you’ll want some dewaxer to get it off again, some paper for mopping up the dewaxer, a tool to scrape the wax off, and maybe a brush to get the grain right. You can get all of these from Intersport etc. Personally, I have maybe three different types of wax in my skin bag along with other limited accoutrements.
Skins
Or, you can get rid of wax altogether and focus on skins that stick to the bottom of your skis (which are the only option for topptur). Modern fjellski have an attachment point midway, so that the skin only covers the middle part of the ski. My old skis, however, required a big long one attached at the front. These are made of fur, synthetic, or a combination. These are stored sticking together, or sticking to a mesh to prolong the life of the glue.
You cannot really go wrong with skins. It’s quite amazing how grippy these can be, particularly a big fat skin under a topptur ski. Just make sure to dry these properly after use and they’ll last a surprisingly long time.
Just in case your skins are coming loose towards the back, it’s sensible to take some electrical tape on longer trips. This works a lot better than duct tape, which usually catches and falls off.
Example
On a ski trip over Hardangerjøkulen, I started with violet wax for near-melting temperatures, but it was warm that day so this wasn’t doing the job incredibly well for steeper slopes. Seeing that the hill was about to get a lot steeper, I opted for skins rather than applying klister. We were going up high, and the snow could be a lot colder there, so the klister would get too much snow stuck to it higher on.
Once we got to the top, I took these off and went for the blue (-10°C to -2°C) which was actually a bit too warm, and I got some snow stuck to my skis. Nothing too bad though, and it easily rubbed off when we started to go downhill. Back at the bottom it was really warm and the snow was fully melting. We still opted not to go for klister because of the mess, and struggled the remaining 1 km over the lake with quite slippy skis.
Types of snow
Yes yes, Norwegians like to talk about snow types a lot.
These are the main ones you might encounter:
Powder: I’ve heard this is great for topptur, but honestly I’m not quite good enough to really enjoy this yet. It’s tough and a different technique, and easy to end up with a mouth full of snow — maybe next winter! It’s a right nightmare for fjellski though; breaking trail through deep powder is intense.
Crust: A thin dusting of powder covers a frozen crust, under which there is more powder. This stuff is the worst — you keep falling through the crust if you’re walking, and transitioning between crust that holds you and crust that doesn’t is really unpleasant. Still, it’s better than…
Rotten: Snow that’s definitely on the way out, with cavities beneath it where it’s melting from the ground up. In moderation, this can be funny, but it gets to a point where it’s too much.
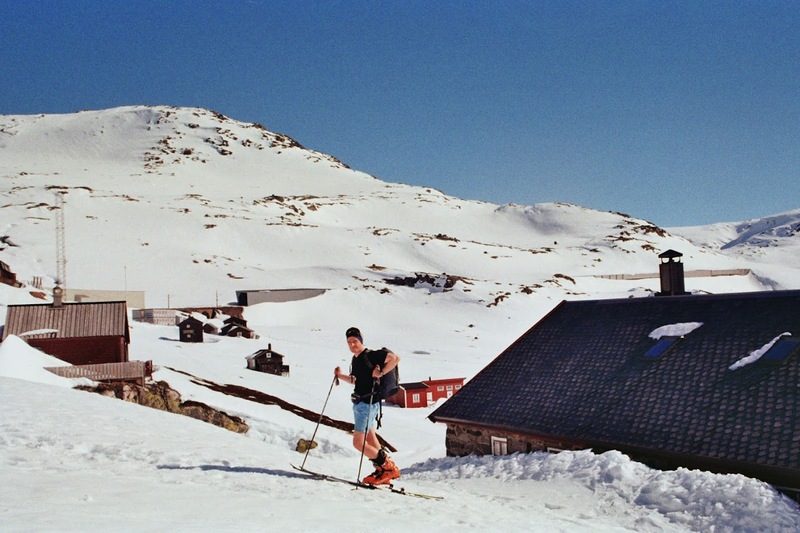
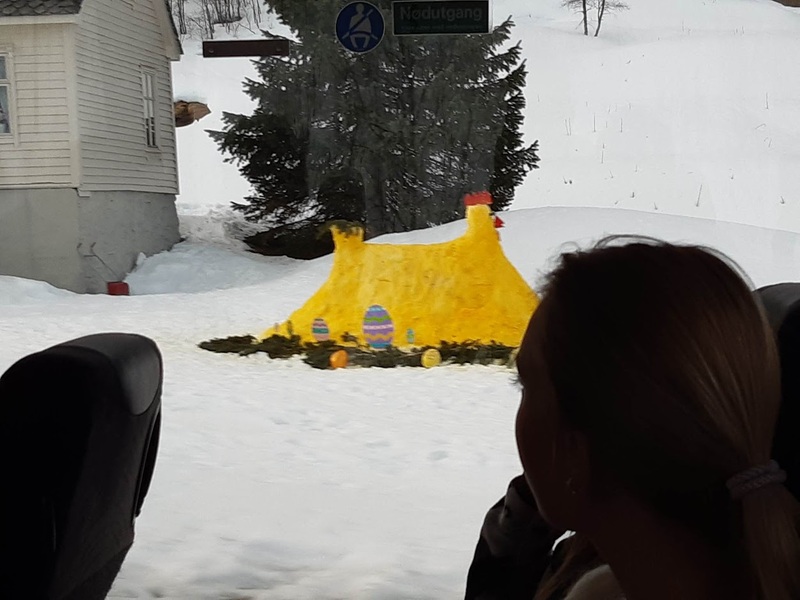
Påskesnø: Or ‘Easter snow’. This is great! Really buttery snow that’s started melting but is nowhere near rotten yet. Really good for intermediates and beginners alike, and for effortlessly covering long distances.
Places you might hear about
There are a lot of options for skiing around Bergen, and it can get confusing hearing about them all. Here are some brief descriptions of the main ones:
Voss: Accesible by a relatively short train journey. Home to the Voss resort and the location for the Bjerknes getaway the last few years. A large inland town by Norwegian standards.
Finse: Further up along the Bergen to Oslo line. No shops, some fancy modern cabins, some not so fancy old cabins, a button lift, a research station, a big lake, a big glacier and not a lot else. Used for training for polar expeditions back in the day.
Gullbotn: Not so far from Bergen by bus or car and home to a lysløper (flood lit skiing track). Also where you’d start for Gullfjellet, probably.
Sogndalsføra: The main town in Sognefjord. Nice enough place, but you’re probably there to explore the nearby mountains, Jostedal being a main attraction.
Kvamskogen: More cabins than you can shake a stick at, and good fjellski, topptur, and langrenn possibilities. Also a couple of very small ski resorts which can be fun. It’s on the way from Bergen to …
Norheimsund: Which, along with Øystese next door are the largest settlements in (the upper part of?) Hardangerfjord. Less skiing direct from here, as the fjord sides are very steep, and most people like to start a bit higher up.
Thanks for reading. Do drop me an email if you found this useful — always good to get feedback : )